
A comprehensive guide to rigging your boat correctly for years of hassle-free function on the water.
You’ve made the switch to lithium – or you’re about to. Either way, you’ve got questions. How do you rig your boat the right way? Which batteries do you actually need? What charger works with what? And is this something you can do yourself, or do you need to hand it off to a pro?
We built this guide to answer all of it.
TABLE OF CONTENTS
Rigging a boat with lithium batteries isn’t complicated – but it does require the right information up front. Get it right and you’ll have a setup that runs harder, lasts longer, and never leaves you dead in the water. Get it wrong and you’re dealing with charging headaches, shortened battery life, or worse.
This guide walks you through everything from cost expectations and whether DIY rigging is realistic for your skill level, all the way through battery selection, charger matching, the actual rigging process, and the safety considerations that matter most on the water. We’ve also packed in a resource section and a no-fluff FAQ so you can get answers fast and get back to fishing.
Whether you’re rigging a tournament bass boat, a big-water walleye rig, or a serious weekend warrior setup – this is your starting point. Let’s get it done right.
RIGGING OVERVIEW & CONSIDERATIONS
Rigging Cost & What It Takes to Do It Right
Dealer vs. DIY – Know Before You Go
Before you buy a single battery or pull a single wire, you need to answer one question: are you rigging this boat yourself, or are you handing it off to a marine dealer?
Both are legitimate paths. But they come with very different price tags – and very different demands on your time and knowledge.
What Does Dealer Rigging Cost?
A full lithium rigging job at a marine dealer isn’t cheap. Depending on your boat’s complexity, the number of batteries, and your local market, professional rigging labor can run anywhere from $500 to $2,000+ – and that’s before a single battery is purchased. If you’re adding trolling motor wiring, installing a dedicated bus bar, mounting onboard chargers, and integrating fishing electronics, those hours add up fast. Dealers do great work, but you’re paying for their time, their expertise, and their shop rate.
If budget is a factor, and for most anglers it is, the DIY route is worth serious consideration.
DIY Rigging: Real Savings, Real Responsibility
Rigging your own boat can save you hundreds of dollars and gives you complete ownership of how your system is built. There’s also something to be said for knowing exactly how every wire is run and every connection is made – that knowledge pays dividends if you’re troubleshooting at 5am on a tournament morning.
That said, DIY rigging isn’t plug-and-play. It requires a working knowledge of boat electrical systems and the hands-on skills to execute the job cleanly and safely. If you’re missing either of those, the savings aren’t worth the risk.
What You Need to Know
To rig your own boat confidently, you should be comfortable with the following:
DC Electrical Systems – Marine boats run on 12V, 16V, 24V, or 36V DC electrical systems depending on your trolling motor and onboard electronics. You need to understand how voltage, amperage, and wiring capacity work together – and how lithium batteries differ from lead-acid in how they deliver and receive power. Miswiring a DC system doesn’t just prevent your system from functioning correctly. It can cause irreversible damage to your boat, electronics & motors.
Wire Work – Proper wire cutting, sizing, and termination is non-negotiable. That means selecting the correct gauge wire for each application, making clean cuts, and installing terminals that are crimped correctly, not just twisted and taped. A loose or undersized connection is a failure point waiting to happen.
Heat Shrink & Weatherproofing – Every terminal connection on a boat needs to be sealed and protected. Heat shrink tubing locks out moisture and corrosion, which is the enemy of any marine electrical system. Knowing how to apply it correctly is a basic but critical skill.
Component Mounting – Batteries, onboard chargers, buss bars, and electronics all need to be securely mounted. On a boat, nothing stays still – you’re dealing with vibration, wakes, and rough water. Components that aren’t properly fastened become projectiles or pull connections loose over time. A clean, secure mount is part of a safe, reliable rig.
The Bottom Line
If you’ve got the electrical knowledge and the mechanical confidence, DIY rigging is absolutely within reach and Norsk Lithium has the resources to help you get there. If you’re starting from scratch on the electrical side, consider pairing with a trusted marine dealer for the install while you use this guide to make sure you’re specifying the right equipment.
Either way, knowing what goes into a proper rig makes you a smarter buyer and a better-equipped angler.
HOW TO PICK THE RIGHT BATTERIES FOR YOUR NEEDS
Don’t Guess. Get the Right Power for the Way You Fish.
Not all lithium batteries are created equal – and not all fishing setups demand the same power. The right battery for a weekend kayak angler is not the right battery for a tournament pro hammering big water from sunrise to dark. Before you buy, take a hard look at how you fish, where you fish, and what you’re running on the water. The answers will point you straight to the right setup.
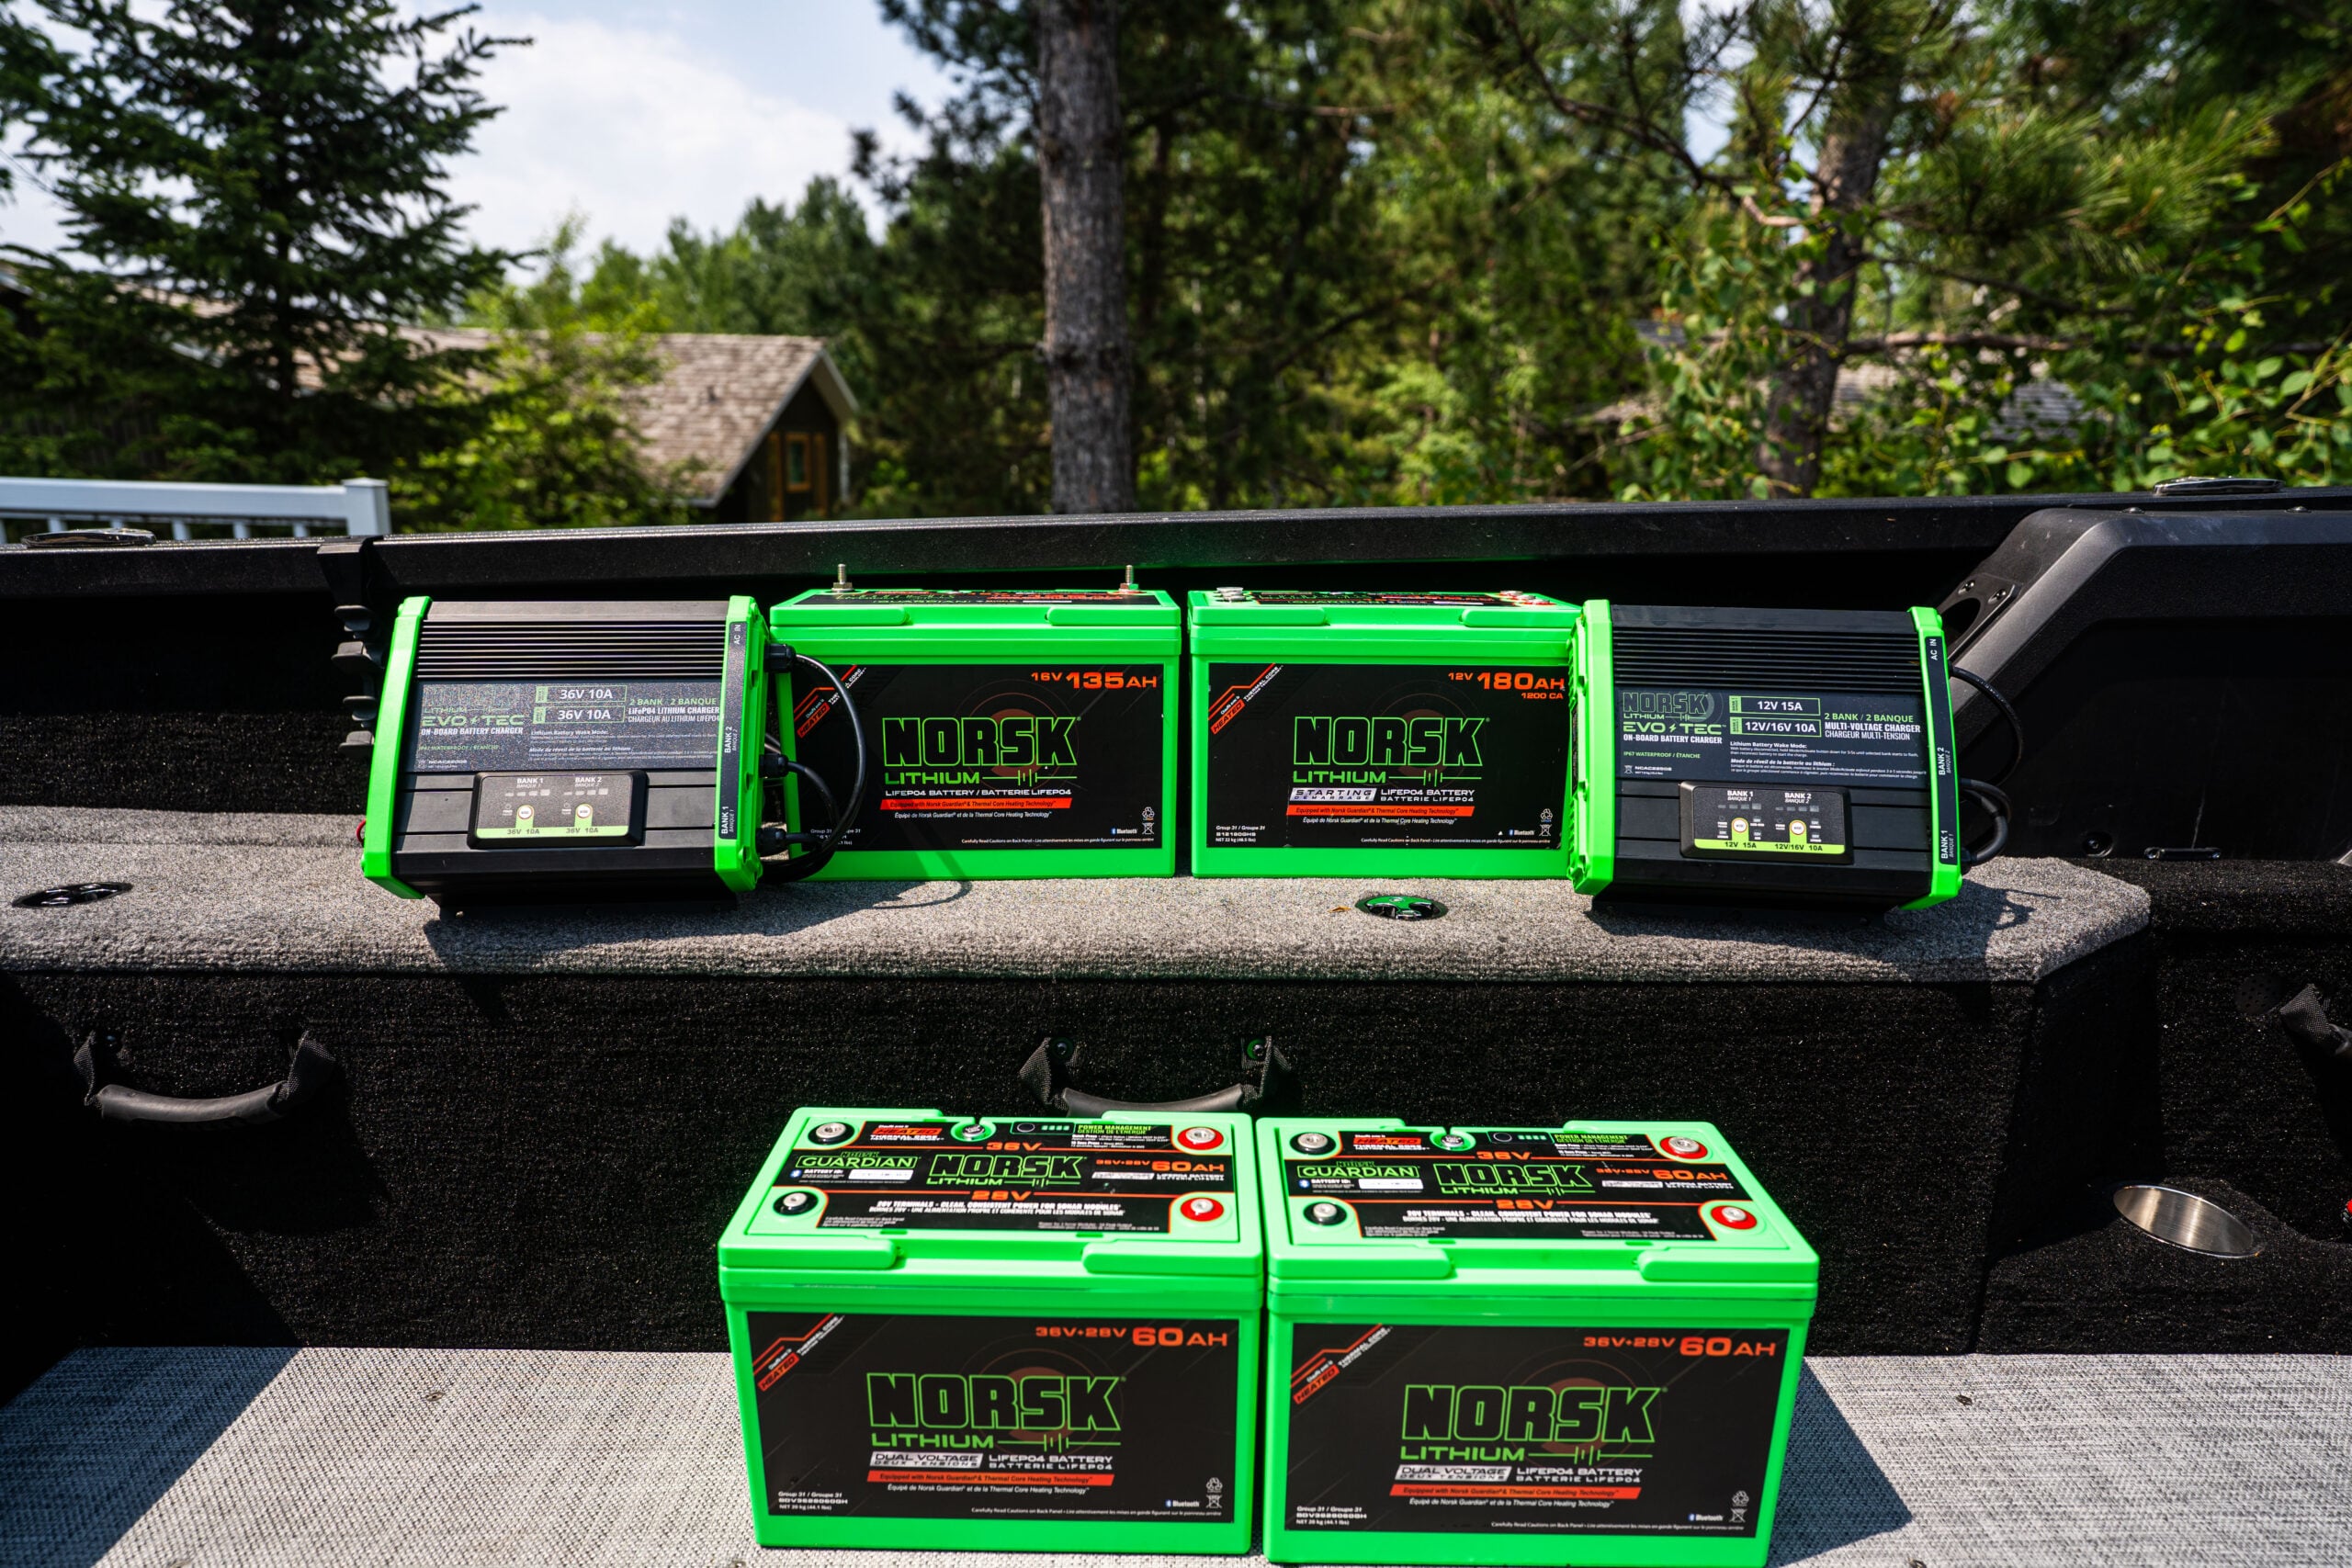
Norsk Lithium Battery Categories
Norsk Lithium builds batteries for three core applications
- Trolling Motor Batteries – Built to deliver consistent, high-draw power to your electric motor from the first cast to the last. Available in 12V, 24V, and 36V configurations to match your motor’s voltage system.
- Starting Batteries – Starting Batteries, Engineered to deliver confident cranking power for your outboard while handling electronics, livewells, and accessories with ease, with critical safety features built in.
- Electronics & Sonar Batteries – Purpose-built for forward-facing sonar, high power-draw digital units, and electronics with large displays. Our lineup of 16V Max Runtime batteries are designed specifically for the power demands of today’s live imaging technology.
Warranty Coverage You Can Count On
Every Norsk Lithium Battery is backed by an industry-leading 10+2 Year Warranty and rated for 4,000+ charge cycles. That translates to roughly 15 to 20 years of dependable performance in real-world conditions. No prorating. No fine print. Just power you can count on for the long haul.
When you’re buying a Norsk Lithium battery, you’re not buying for this season. You’re buying for the next decade and a half.
Consider Your Fishing Conditions
Where you fish matters as much as what you’re fishing for. A small inland lake puts very different demands on your batteries than running 30 miles offshore on Lake Erie or charging down the Mississippi River. Big water means longer runs, bigger motors, and more time between charges. River fishing adds current to the equation, your trolling motor is working harder to hold position. Be honest about the conditions you regularly fish, and build your battery setup around worst-case days, not average ones.
Consider Your Boat Size & Trolling Motor
Your trolling motor’s thrust rating and voltage system is one of the biggest factors in determining what batteries you need. As a general rule:
- 12V systems are common on smaller boats and kayaks with lower-thrust motors
- 24V systems are standard on mid-size bass and walleye boats
- 36V systems power the high-thrust motors found on larger tournament rigs and big water boats
The heavier the boat and the more thrust your motor pulls, the more battery capacity you need to maintain runtime. Bigger isn’t always necessary – but under sizing your battery bank is a mistake you’ll feel every time you hit the water late in the day.
Single Battery vs. Dual Battery Setups
Many anglers ask whether they need one battery or two for their trolling motor. The answer depends on your runtime needs, boat size, and how you fish. For longer days or heavier current demands, a dual battery setup gives you more total capacity and peace of mind.
The cleanest solution for running dual batteries is to wire them in parallel with the positive connection on battery #1 and the negative connection on battery #2. This balances charge between batteries and protects both from over-discharge.
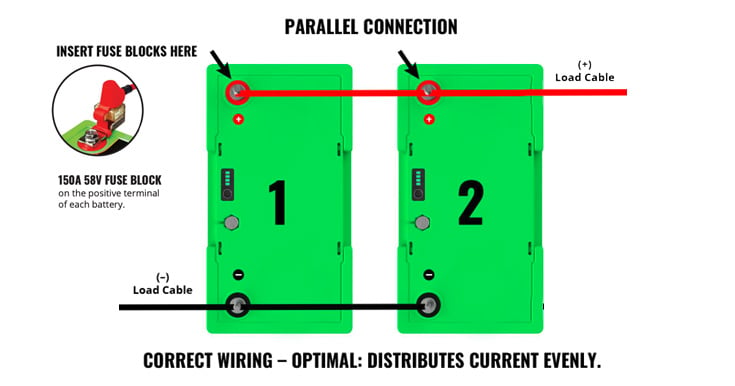
It’s a simple wiring guideline that makes a dual setup run smarter and last longer. We’ll cover this in more detail in the rigging section.
Compartment Size & Budget Constraints
Real-world rigging doesn’t always happen in ideal conditions. Battery compartments on older boats weren’t designed with present day electronics & technology in mind, and sometimes physical space is the deciding factor. The good news is that Norsk Lithium batteries are significantly lighter than their lead-acid equivalents and are offered in BCI-compliant cases – giving you more flexibility to work within tight compartments without sacrificing capacity.
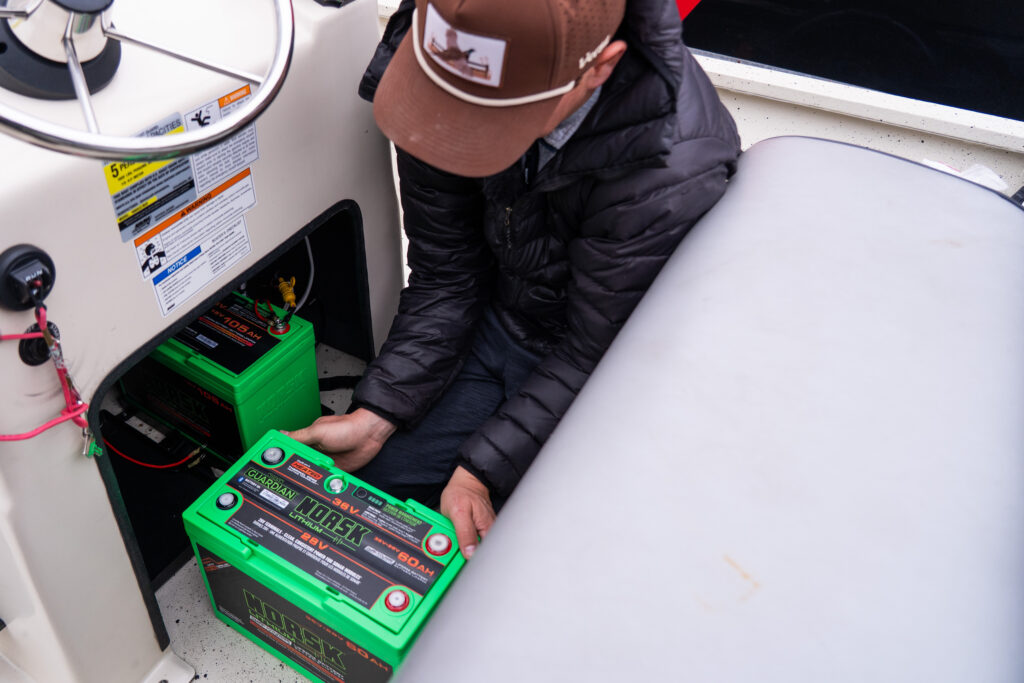
Example: Our 36V 60Ah Dual Voltage Battery delivers true 36V power for your trolling motor in a single unit, replacing three batteries while fitting within the footprint of one Group 31 case, maximizing space without compromise. The 36V also features 28V terminals designed to power Garmin’s black box for Forward Facing Sonar, further simplifying rigging.
If budget is a factor, start with what your most critical application demands and build from there. A quality trolling battery today is better than a compromised full setup that cuts corners across the board.
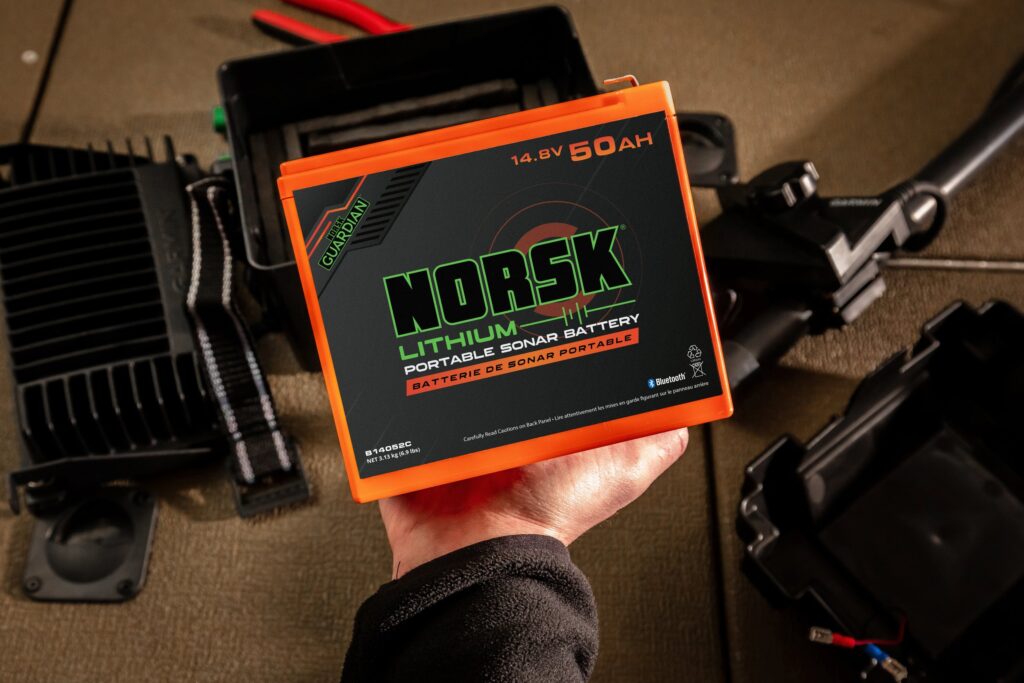
Dedicated FFS Power In A Compact Battery
It is possible to provide clean power to make the most of the Live Imaging setup in your boat even if you don’t have the room for an additional marine battery. Our line of 14.8V portable sonar batteries have plenty of power for all day runtime but come in a lightweight package & smaller case size.
Norsk Lithium 14.8V portable sonar batteries are available in 15AH, 20AH, 30AH & 50AH size options to fit your needs.
Consider Your Daily Time on the Water
How many hours are you actually running your trolling motor on a typical day? A casual half-day trip has very different power demands than a 10-hour tournament grind with your sonar running full tilt the entire time. Think through your real usage – not your ideal usage – and size your battery setup to handle a full day without sweating your remaining capacity.
Use this chart as your starting point for dialing in the right power setup. No two boats are rigged the same, but these configurations are designed to match real-world fishing demands and keep you powered all day.
12–16FT
|
12-16FT
|
17-19FT
|
20FT+
|
|
| Electronics | 1 unit | 1-2 units | 2-3 units | 4+ units |
| Trolling | 12V | 12V – 24V | 24V – 36V | 36V |
| Time on the Water | 4–8 hrs | 4–8 hrs | 8–12 hrs | 12–14 hrs |
| Recommended Batteries |
1 Battery: 12V 120Ah 2 Batteries: 14.8V 50Ah Electronics 12V 105Ah Trolling |
2 Batteries: 12V 120Ah Starting & Electronics 12V 105Ah or 24V 60Ah Trolling |
3 Batteries: 12V 180Ah Starting 16V 105Ah Electronics 24V 90Ah or 36V 60Ah Trolling |
4 Batteries: 12V 180Ah Starting 16V 135Ah Electronics Dual 36V 60Ah Trolling |
Battery recommendations are provided as a general guide. Confirm compatibility with your electronics, charging system, & marine motor before installation.
Not Sure Your Battery Will Last A Full Day?
If you’re still unsure whether the battery your considering will last long enough, add an EVO-TEC™ DC to DC charger for on-the-go charging and extra peace of mind. They connect directly to your starting battery to charge other on-board batteries, like your trolling motor or dedicated electronics battery, and can be controlled through the accessory wire tied to your key or a manual switch. At the same time, your starting battery is quickly replenished by the outboard motor, giving you the freedom to stay out longer without worrying about running low. *More information on DC to DC chargers in the next section.
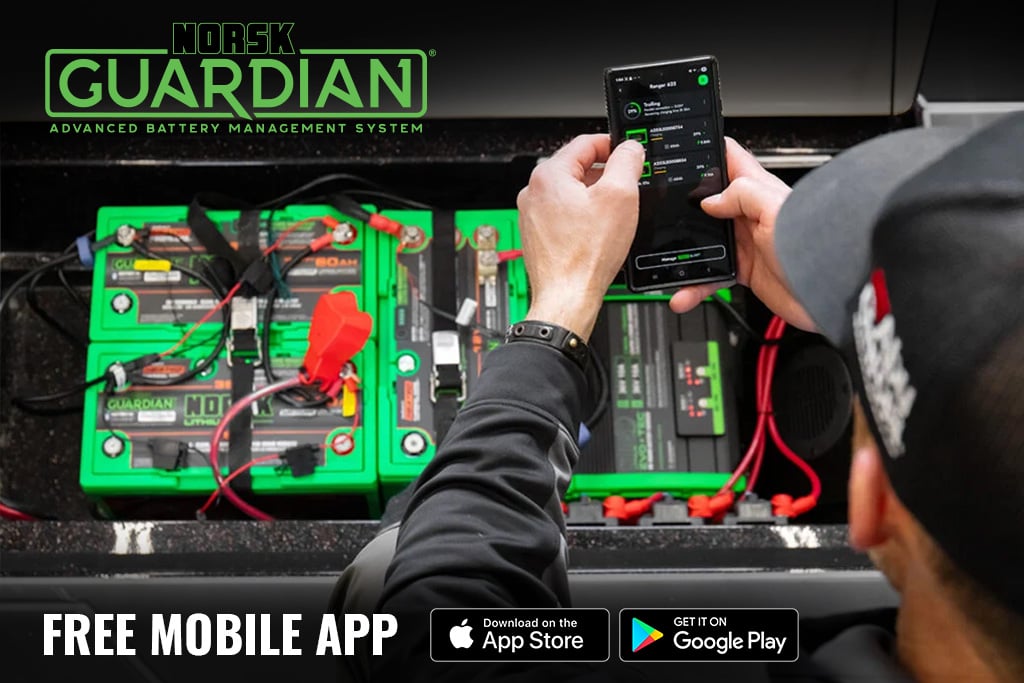
The Norsk Guardian® App gives you a clear view into your power system, allowing you to track consumption, monitor usage, and understand exactly how your setup performs on the water. With real-time insights into draw and remaining capacity, it becomes much easier to dial in the right battery configuration and maximize every hour on the water with confidence.
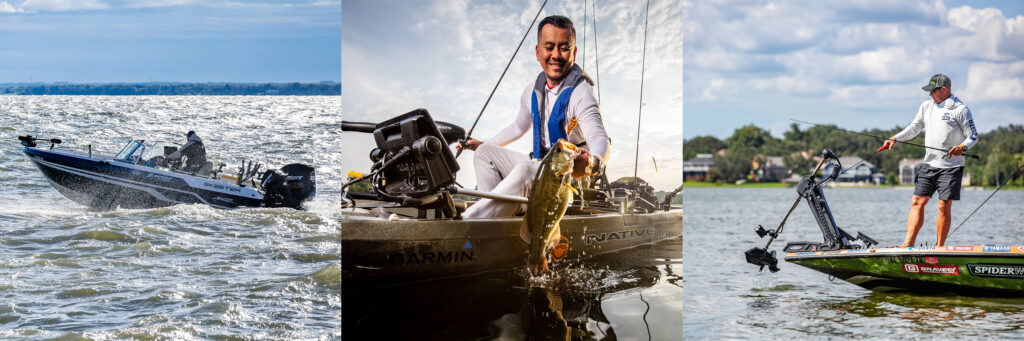
Need Inspiration? Check Out Our Pro Rig Rundown Videos
Not sure where to start? Let the pros show you how they do it. Our Pro Rig Rundown video series breaks down exactly how Norsk-sponsored tournament anglers and professional guides have rigged their boats – battery placement, charger setups, wire runs, and all. Real boats. Real setups. Real insight from people who fish harder than most.
👉 Check out the Pro Rig Rundown Videos Series
HOW TO PICK THE RIGHT CHARGER
Match Your Charger to Your Setup – Every Time
Picking the right charger isn’t a footnote, it’s a critical part of your rig. The wrong charger can undercharge your batteries, damage your cells, or at worst create a safety hazard onboard. Get it right from the start and your batteries will charge faster, last longer, and perform exactly the way they were built to.
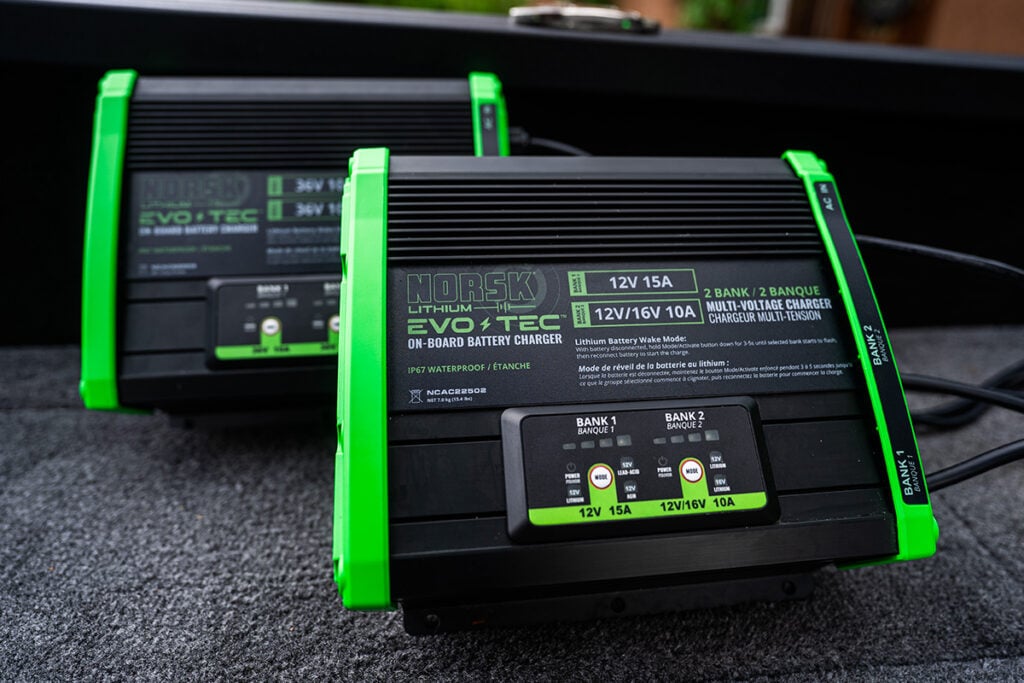
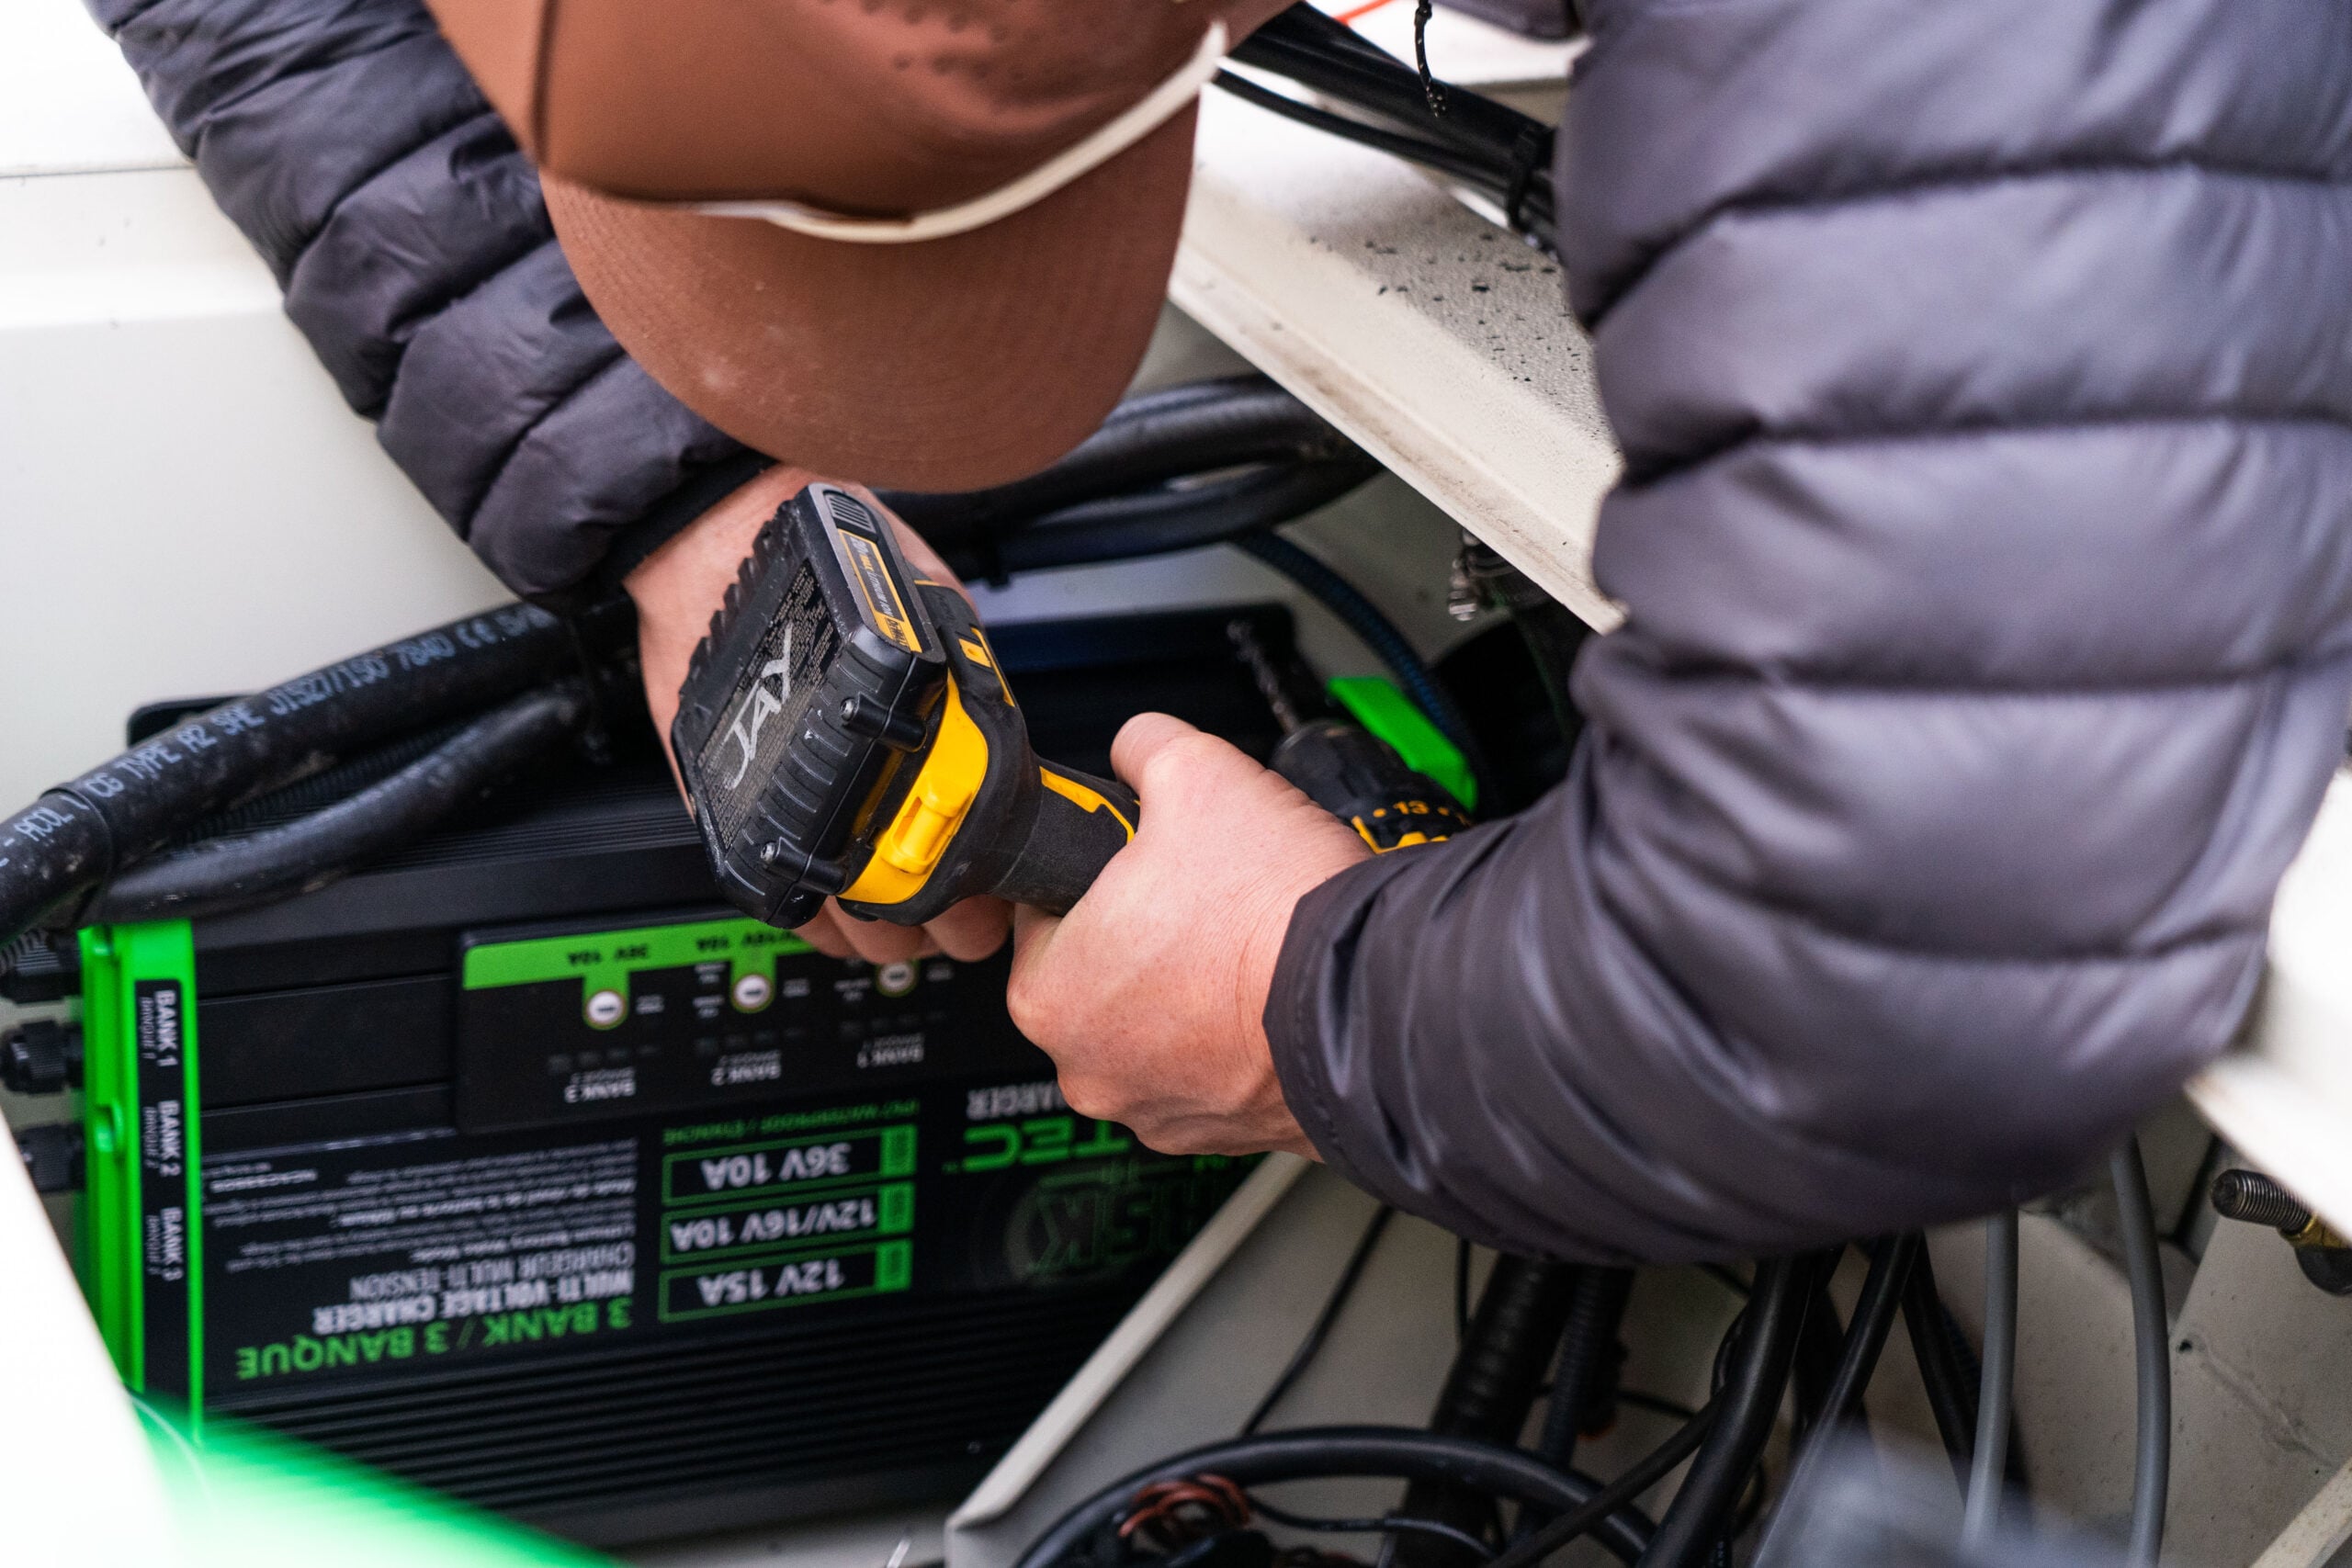
EVO-TEC™ On-Board Chargers: Confidence in Every Charge
The Norsk Lithium EVO-TEC™ series represents the next evolution in marine battery charging and was built specifically to handle the complexity that comes with modern multi-battery boat rigs.
What sets EVO-TEC™ apart from everything else on the market is its switchable voltage and selectable chemistry – two features that eliminate the need to buy a different charger every time your setup changes.
Selectable Chemistry means Bank 1 on an EVO-TEC™ charger can be set to charge Lead Acid, AGM, or Lithium – so if you’re running a lithium trolling battery and a lead-acid starting battery, one charger handles both without compromise.
Switchable Voltage on select models allows you to toggle between voltage outputs. For example, you can switch between 12V and 16V directly on the charger. That kind of flexibility is a game-changer for anglers running forward-facing sonar setups on 16V batteries alongside a standard 12V starting battery.
The EVO-TEC™ line covers 1 Bank, 2 Bank, and 3 Bank configurations across 12V, 16V, 24V, and 36V applications with dedicated DC-to-DC units rounding out the lineup. Whatever your rig looks like, there’s an EVO-TEC™ built for it.
👉 Shop the full EVO-TEC™ On-Board Charger lineup
Rule #1: Charger Voltage Must Match Battery Voltage
This is non-negotiable. A 12V charger bank must charge a 12V battery. A 24V bank charges a 24V battery. A 36V bank charges a 36V battery. Mismatching voltage between your charger and your battery is one of the most common and most damaging mistakes in boat rigging.
With lithium batteries especially, charging at the wrong voltage can trigger the battery’s internal Battery Management System (BMS) to shut down the charge cycle, meaning your battery never reaches full charge. In worse cases, sustained voltage mismatch degrades cell performance over time. Check your battery voltage, confirm your charger bank matches it, and move on with confidence.
Rule #2: Charger Chemistry Must Match Battery Chemistry
This is critical. A charger designed for lead-acid batteries should not be used on lithium, and a lithium charger should not be used on lead-acid. Each battery chemistry requires a specific charging profile, and mismatching them can lead to incomplete charging, reduced performance, or long-term damage to the battery.
Lithium batteries, including LiFePO4, require precise voltage curves and charge termination that differ from traditional lead-acid chargers. Using the wrong chemistry setting can prevent the battery from reaching a full charge or, over time, negatively impact battery health. Always confirm your charger is compatible with your battery’s chemistry before charging.
The EVO-TEC On-Board Charger lineup simplifies this by offering selectable chemistry on the first bank, allowing you to safely charge both a lead-acid and a LiFePO4 lithium battery with a single charger.
Dedicate a Charger Bank to Each Battery
The cleanest and most reliable charging setup gives every battery its own dedicated charger bank. This ensures each battery receives a complete, properly managed charge cycle – independent of every other battery on the boat.
Shared charger banks that split output across multiple batteries are a compromise. One battery may pull charge faster than the other, leaving both undercharged. Dedicated banks eliminate that problem entirely and give you the confidence that every battery on your rig is ready to go when you hit the water at 5am.
If you’re running three batteries, a 36V trolling battery, dedicated 16V electronics battery and a 12V starting battery – the EVO-TEC™ 3 Bank selectable chargers were designed precisely for this scenario. One unit. Three dedicated banks. Complete coverage.
👍 PRO TIP
Double Stacking Leads for Faster Charging
Need to cut your charge time down? Double stacking charger leads is a technique used by tournament anglers and serious fishing guides who can’t afford to wait around between trips.
The concept is straightforward, by running two charger leads to the same battery, essentially doubling the amperage input, you can significantly reduce overall charge time. This works on compatible multi-bank chargers where output leads can be paired to the same battery bank.
Always check your charger manual before attempting this. Not all onboard chargers allow lead stacking, and not all systems are designed to support it.
EVO-TEC On-Board Chargers from Norsk Lithium are designed to support this setup, allowing safe double stacking of leads for faster, more efficient charging when configured correctly.
When done properly with a compatible charger, it’s a legitimate strategy to get fully charged faster and get back on the water sooner.
EVO-TEC™ DC-to-DC Chargers – The Smart Solution for Complex Configurations
If you’re running a single battery setup due to space constraints or want to charge your trolling setup while on the water, a DC-to-DC charger is one of the most valuable tools in your rigging arsenal.
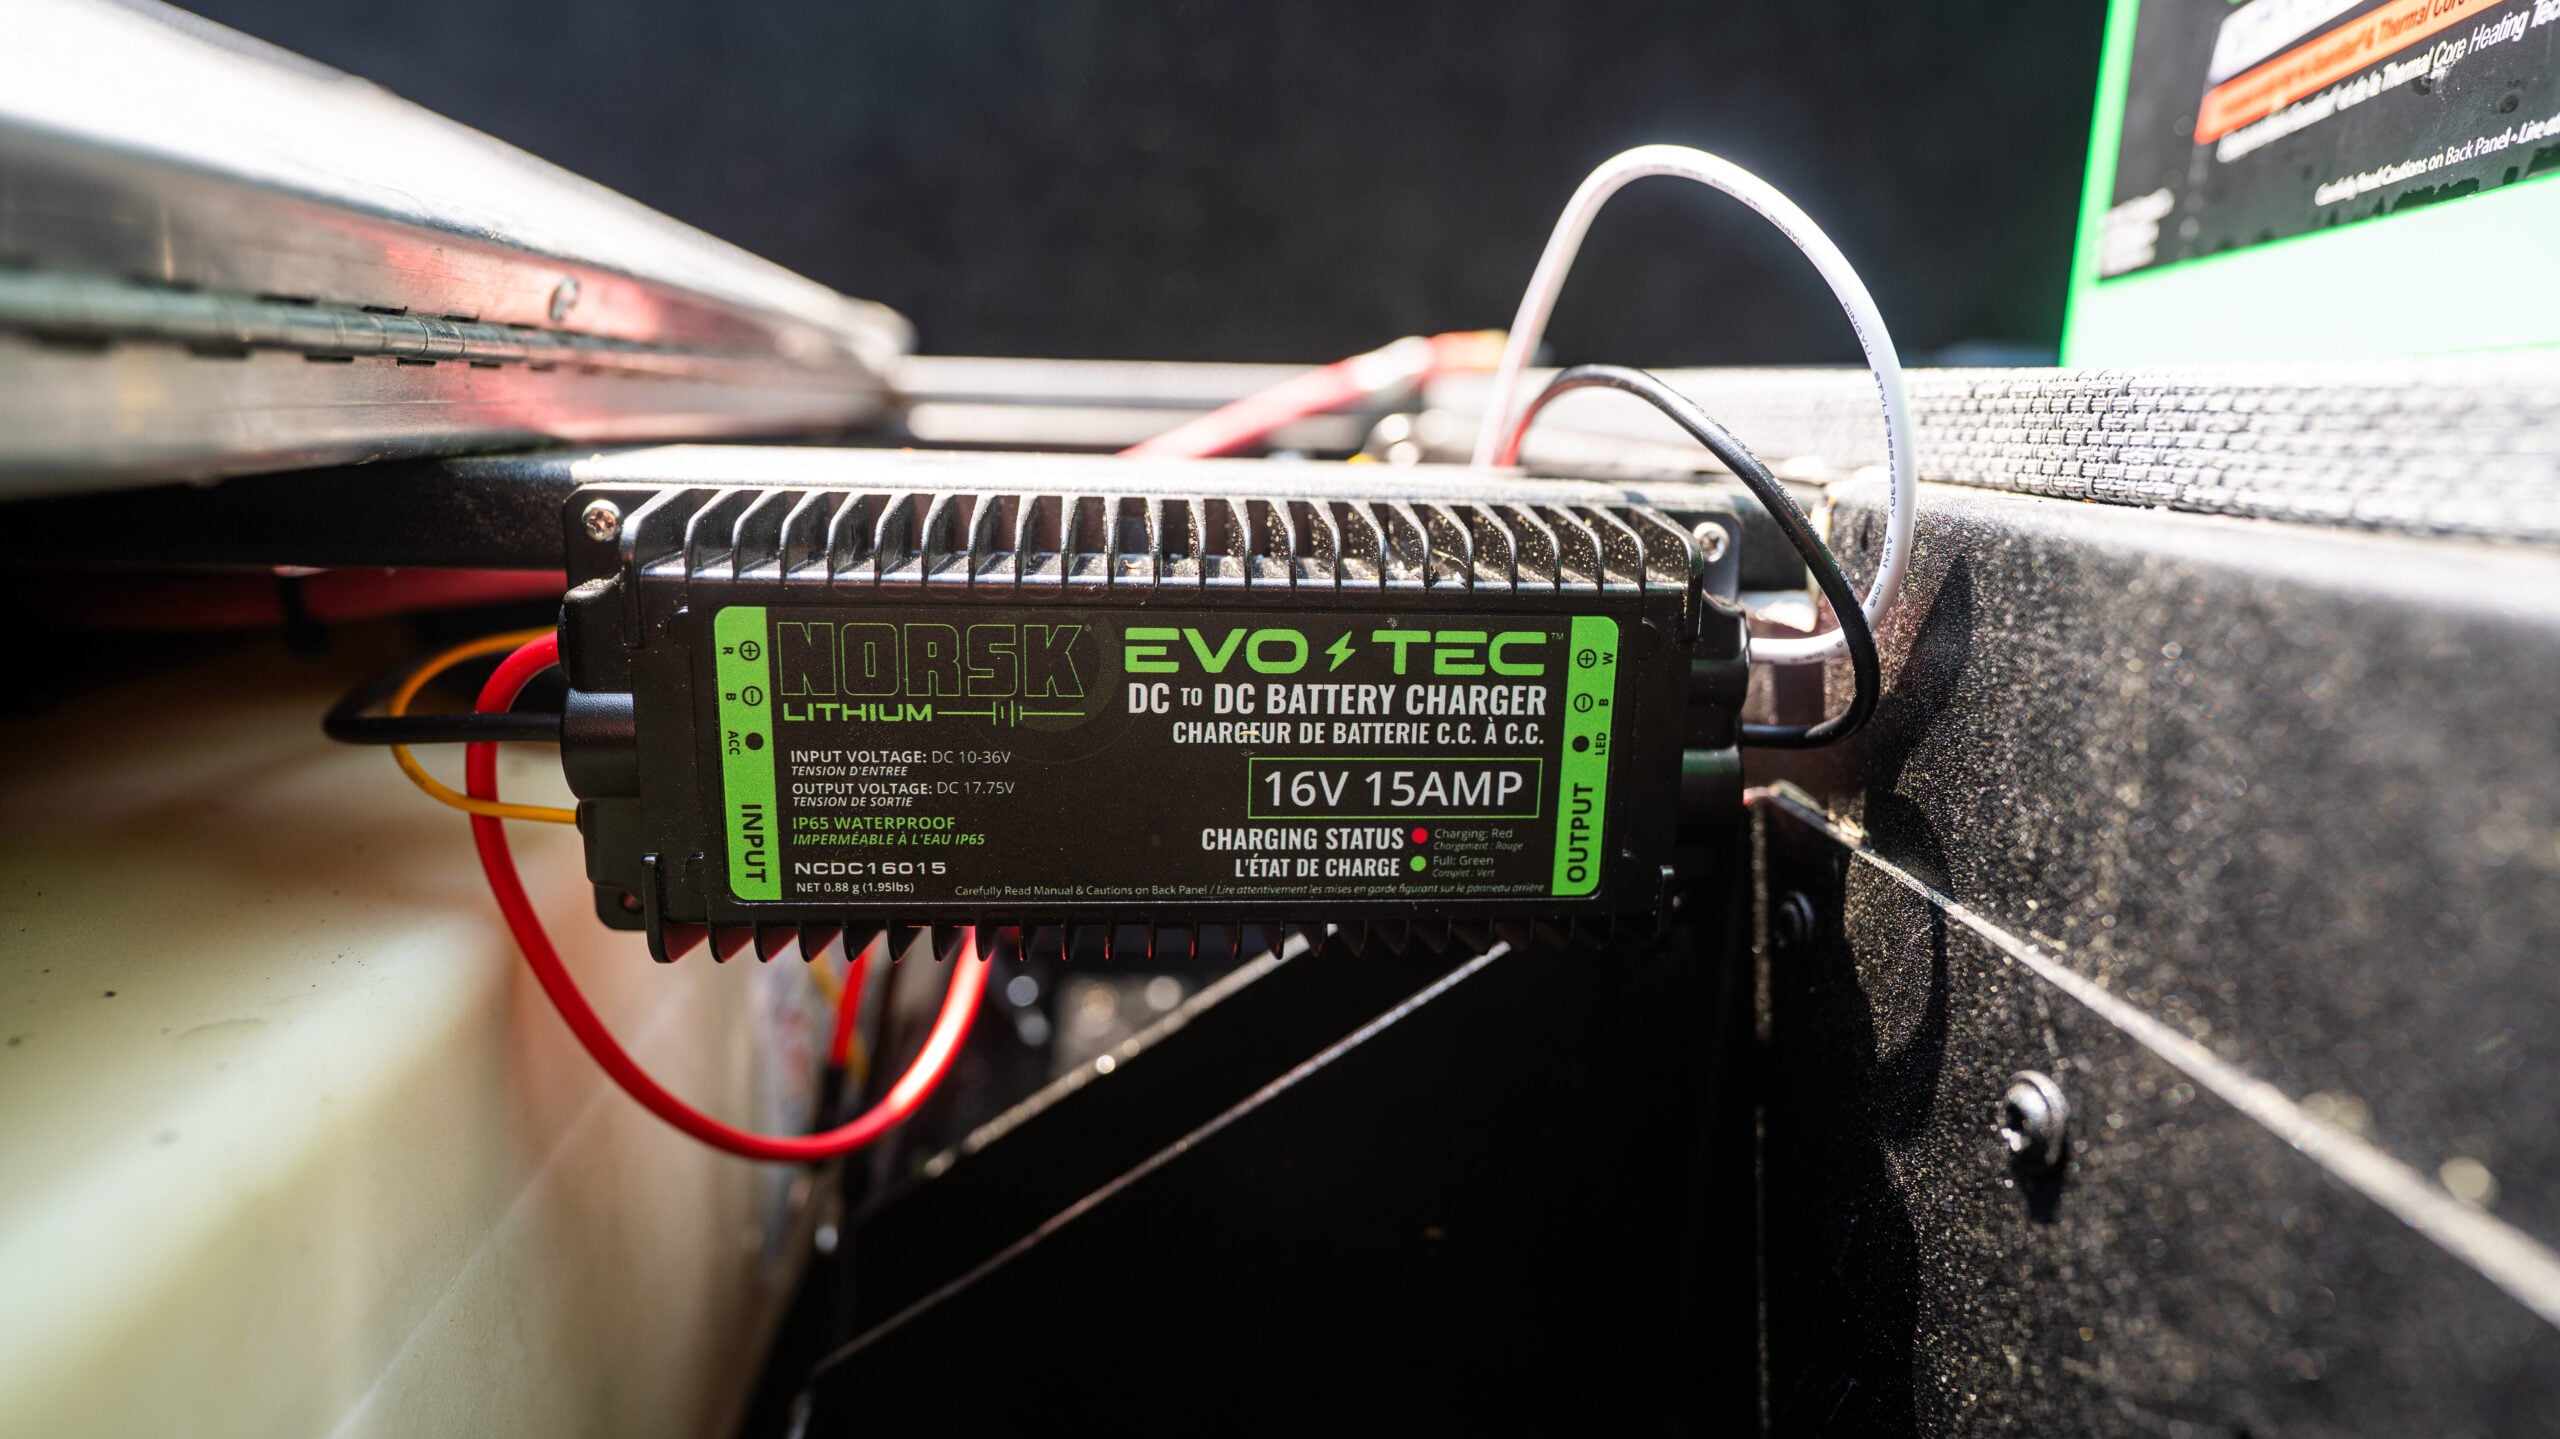
The Norsk Lithium EVO-TEC™ DC-to-DC charger lineup is available in 12V, 16V, 24V, and 36V output options and is well-priced at $219.99 per unit, making it a no-brainer. Here’s what makes them essential:
Voltage Conversion – A DC-to-DC charger takes power from one voltage source like your 12V cranking battery being charged by your outboard’s alternator and converts it to the correct output voltage to charge a separate battery, for example power from a 12V starting battery into a 36V trolling battery. This means your outboard can passively top off your starting battery which which is shared through to your trolling battery, while you run to your next spot with no shore power required.
Accessory Switch (ACC) Input – EVO-TEC™ DC-to-DC chargers include an accessory wire input that allows the unit to activate and deactivate, in one of two ways; automatically by your ignition or manually by an accessory circuit switch. When the key is on and the outboard is running, the DC-to-DC charger kicks on and tops off your secondary battery from your starting battery. When wired to a switch, you control the activation of the DC to DC charger when it is needed. It’s a smart solution that works quietly in the background keeping you powered up.
Planning Your Configuration – DC-to-DC chargers are particularly helpful when you’re mapping out a battery configuration that mixes voltage levels, chemistry types, or charging sources. If you’re running a 36V trolling system, a 12V starting battery, and a 16V electronics battery – a combination of EVO-TEC™ on-board banks and a DC-to-DC charger gives you a clean, complete charging solution without overcomplicating the wiring.
👉 Check out a Wiring Diagram of a DC to DC Charger in action
The Bottom Line on Chargers
Your batteries are only as good as how well they’re charged between trips. The EVO-TEC™ lineup was built to match the demands of real-world multi-battery marine rigs – with the flexibility, technology, and reliability that Norsk Lithium puts into every product we make. Match your voltages. Dedicate your banks. And let the EVO-TEC™ handle the rest.
👉 Shop EVO-TEC™ On-Board Chargers / 👉 Shop EVO-TEC™ DC-to-DC Chargers
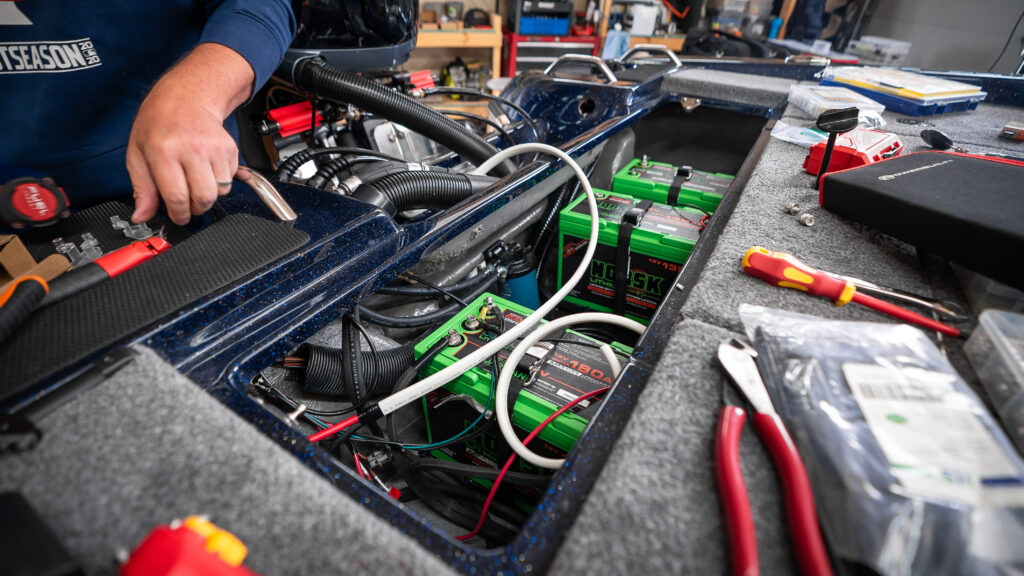
THE PROCESS OF RIGGING IT RIGHT
Rig It Right the First Time
How to Wire Your Boat
Average Duration: ~6 to 8 hours
STEP 1: PLAN YOUR LAYOUT BEFORE YOU PULL A SINGLE WIRE
The biggest mistake DIY riggers make is skipping the planning phase and going straight to cutting wire. Don’t do it. Spend time at the boat before anything is purchased or installed mapping out exactly where every component is going to live.
Walk through these questions before you start:
Battery Locations – Where will each battery be mounted? Consider weight distribution across the boat, proximity to the trolling motor and electronics they’ll be powering, and whether the compartment provides adequate ventilation and secure mounting points. Lithium batteries are significantly lighter than lead-acid, which gives you more placement flexibility – use it to your advantage.
Wire Runs – Once your battery locations are set, trace every wire run from source to destination. Identify the shortest clean path for each run avoiding sharp edges, moving parts, and high-heat areas like the engine compartment where possible. Measure each run carefully and add 10–15% to your length estimate to account for routing around obstacles. Running short on wire mid-install is a frustrating and avoidable problem.
A few minutes with a notepad and a tape measure before you buy a foot of wire will save you hours of headaches during the install.
STEP 2: SET UP A BUS BAR TO CONSOLIDATE YOUR WIRING
If you’re running multiple electronics – fish finders, live imaging units, livewells, aerators, lighting – running individual wire runs from each device back to your battery is the fast road to a wiring nightmare. The cleaner, smarter solution is a bus bar.
A bus bar acts as a central distribution point for your electrical system. Your battery feeds the bus bar through a single heavy-gauge wire run, and each electronic device connects to the bus bar individually with a properly fused circuit. The result is a clean, organized, serviceable wiring system where every circuit is independent, protected, and easy to trace.
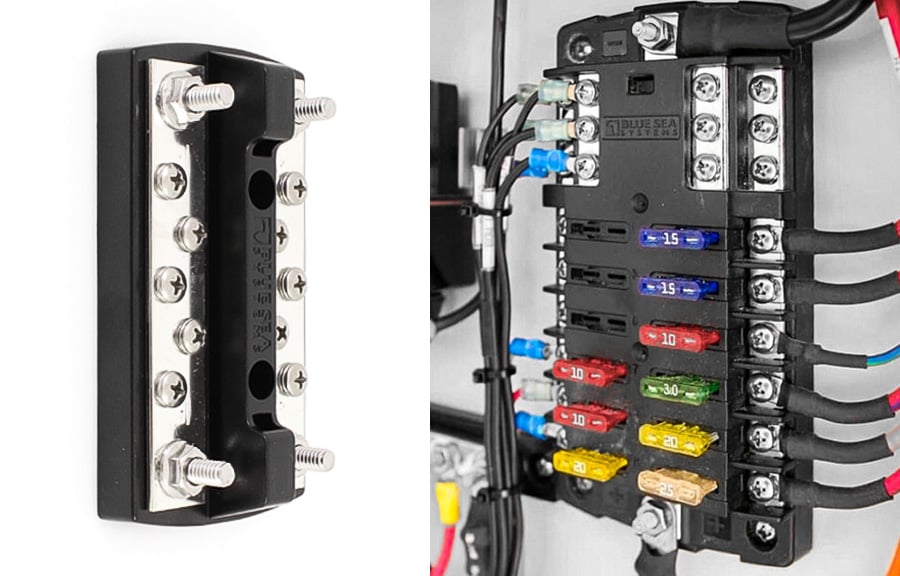
For added convenience, a fused distribution block (pictured right) combines bus bar distribution with integrated fuses at each connection, simplifying troubleshooting, making it easy to identify a blown fuse.
Bus bars also make troubleshooting dramatically easier. If an electronics unit stops working, you can isolate that circuit at the bus bar without touching anything else on the boat. So pick a location that is easy to access and close to your electronics and other equipment. For anyone building a serious rig with multiple electronics, a bus bar isn’t optional – it’s the foundation of a professional-grade install.
STEP 3: GATHER YOUR TOOLS
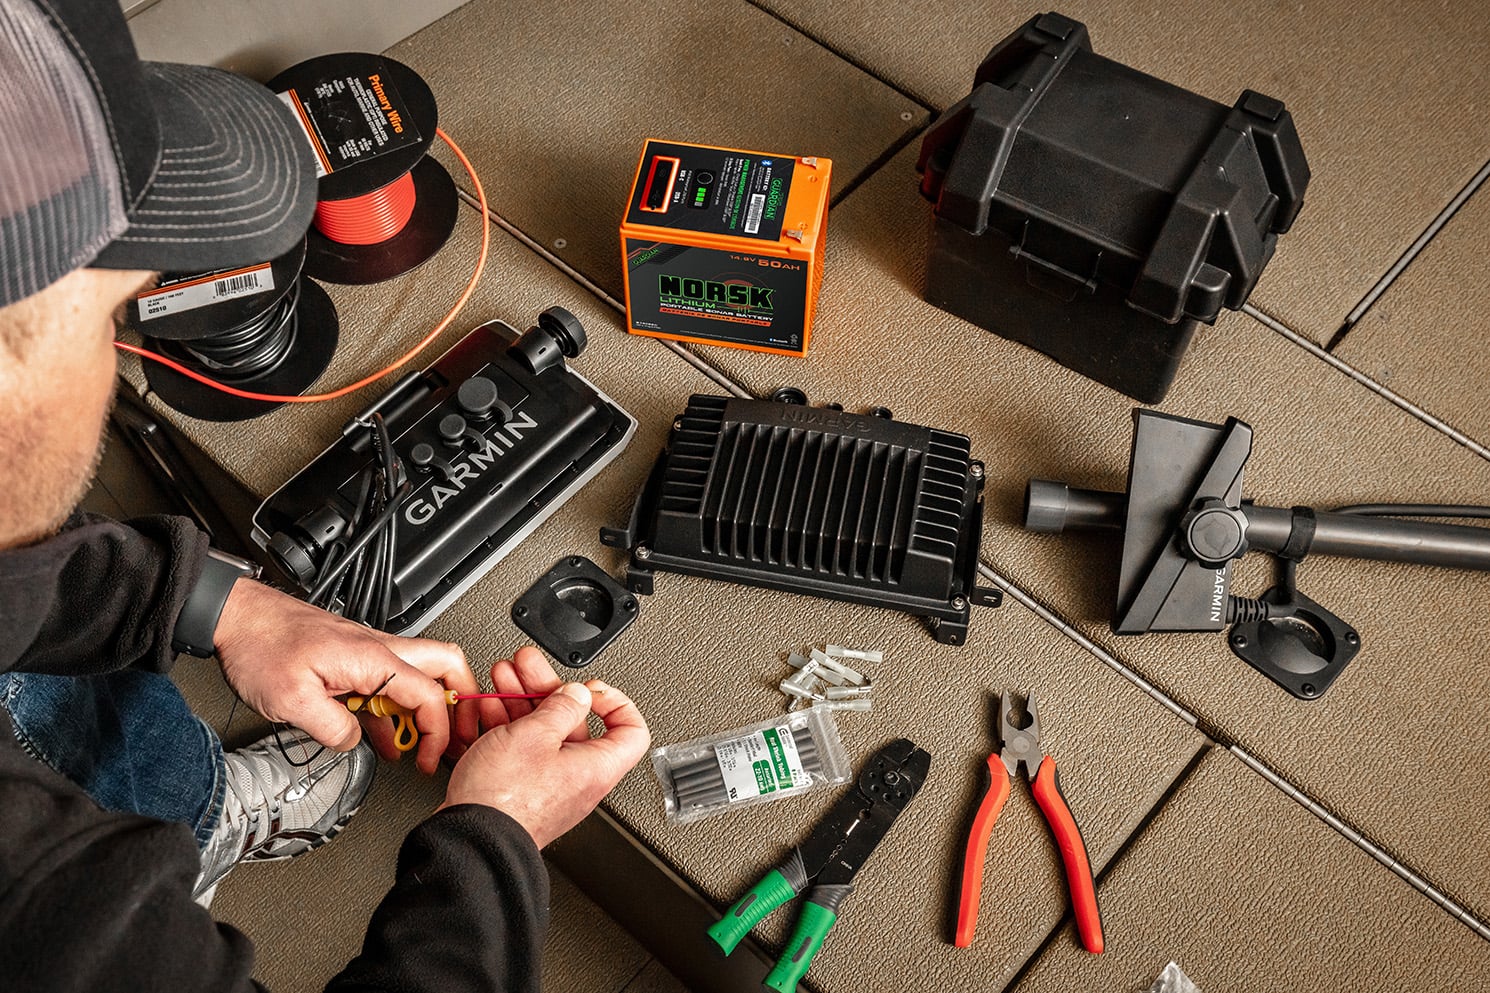
Don’t start until you have everything you need on the bench. Stopping mid-install to track down a tool is how mistakes get made. Here’s what a proper lithium rigging job requires:
Multi-Meter: This is the single most essential tool in the kit. A multi-meter lets you test voltage at every point in your system, confirm connections are live, and verify your batteries are at the correct charge level before and after install. If you don’t own one, buy one before you touch a wire.
Wire Strippers & Crimpers: Quality tools matter here. Cheap strippers nick the wire strands instead of cleanly removing the insulation – and nicked wires are weak points waiting to fail. Invest in a proper marine-grade stripper and a ratcheting wire crimper (more on that below).
Heat Shrink Tubing & Heat Gun: Every terminal connection needs to be sealed. Heat shrink tubing slides over the connection and shrinks tight with the heat gun, locking out moisture and corrosion. Buy assorted sizes so you have the right diameter for every connection on the boat.
Wire Fish Tape or Cable Puller: Running wire through a hull, under carpet, or behind panels without a fish tape is a battle you don’t want to fight. A quality fish tape or cable pulling tool makes long wire runs clean and manageable, especially in tight or blind spaces where you can’t see where the wire is going.
STEP 4: WAKE UP YOUR NORSK LITHIUM BATTERIES BEFORE YOU HOOK ANYTHING UP
This is a step that catches a lot of first-time lithium riggers off guard and it’s important.
Norsk Lithium marine batteries ship in Shutdown mode – a low-power storage state that disconnects the battery’s terminals from internal power to eliminate phantom current draws and protect the cells during shipping and storage. Before you connect a single wire or test with your multi-meter, you need to wake the battery up first.
▶️ Watch Now – How To Wake A Norsk Lithium Battery From Shut-Down Mode
Waking a Norsk Lithium battery from Shutdown Mode is simple – connect the battery to an EVO-TEC™ charger, then press & hold the mode button to turn on the wake feature to provide current to the battery. You could also use a pair of jumper cables to connect to another battery source, Red to Red & Black to Black to provide current to the Norsk battery in Shutdown Mode. Once the battery is active, you’re good to go. Attempting to wire or test a battery still in Shutdown Mode will give you a false zero-voltage reading and can lead to unnecessary troubleshooting confusion before the install even begins.
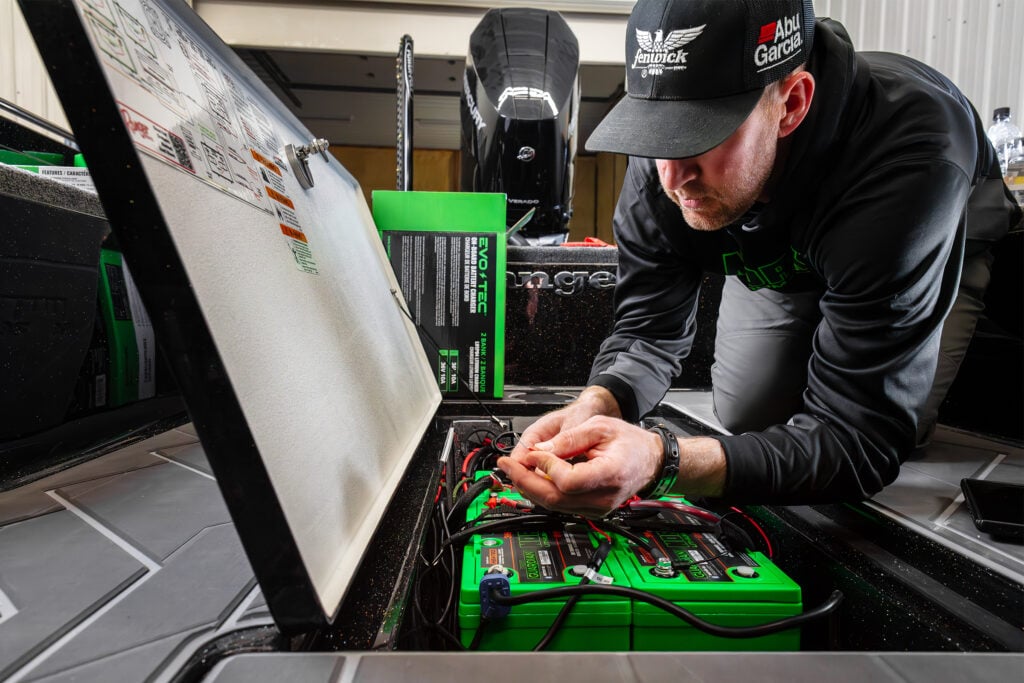
STEP 5: EXECUTE THE INSTALL – TIPS & TRICKS FOR A PRO-GRADE RIG
▶️ Watch Now – Join Jay Siemens as he rigs his bay boat
With your layout planned, bus bar in place, tools on the bench, and batteries awake – it’s time to build. Work through your wire runs methodically, one circuit at a time, and don’t cut corners on any connection. Here’s what separates a clean, reliable rig from one that causes problems down the road:
Use Marine-Grade Connections Throughout: Standard automotive connectors aren’t built for the moisture, vibration, and temperature swings of a marine environment. Marine-grade heat shrink connectors are lined with adhesive-lined tubing that creates a waterproof seal when heated, standard heat shrink tubing does not. Every connection on the boat should be marine-grade. This is not a place to save a few dollars.
Ratcheting Wire Crimpers: A ratcheting crimper applies consistent, calibrated pressure across the full terminal and won’t release until the crimp is fully set. That mechanical guarantee is the difference between a connection that holds for fifteen years and one that works loose after a season of vibration on the water. If you’re using a standard plier-style crimper, upgrade before you start this install.
Heat Shrink Every Connection, No Exceptions: Before crimping every terminal, slide heat shrink tubing over the wire, when connection is complete slide the heat shrink over the top and apply the heat gun until it shrinks fully and the adhesive seals the end. This is your moisture barrier. On a boat, every exposed connection will eventually see water spray, condensation, rain, or a rogue wave. Heat shrink is cheap insurance that protects every connection for the life of the rig.
Label Your Wiring: Every wire run should be labeled at both ends before it disappears into the hull. Use a label maker or write-on wire tags and mark each wire clearly – what it powers and what voltage it carries. The five minutes you spend labeling now will save you an hour of tracing wires the next time you need to service, add to, or troubleshoot your system. Future you will be grateful.
Bundle and Secure Wiring with Zip Ties: Loose wiring is a problem waiting to happen. Bundle your wire runs together with zip ties at regular intervals, securing them to existing structure in the hull where possible. A clean, bundled wire run can’t snag on gear, can’t get pinched by a battery compartment lid, and can’t chafe against a sharp edge over time. Trim your zip tie tails flush after tightening – sharp zip tie stubs are their own hazard in a gear-packed compartment. This is one of those details that separates an amateur install from one that looks like it rolled out of a pro shop.
The Result: A Rig That Works Every Time
A properly planned and executed lithium rig is one of the most satisfying upgrades you can make to your boat. Clean wire runs, dedicated charging banks, a consolidated bus bar, and properly sealed connections add up to a system that starts every trip right – no dead batteries, no loose connections, no chasing issues at the boat ramp. Do it right once, and you won’t have to think about it again.
Supply:
- Batteries
- Bulk Wire – Proper Gauge
- Connectors – Marine Grade
- Inline Fuses or Fuse Blocks
- Bus Bar or Fused Distribution Block
Tools:
- Multi-Meter
- Wire Strippers & Crimpers
- Heat Shrink Tubing & Heat Gun
- Wire Fish Tape or Cable Puller
SAFETY CONSIDERATIONS & GUIDELINES
This Is the Section You Can’t Skip
A well-rigged boat is a safe boat. And when it comes to lithium batteries and marine electrical systems, cutting corners on safety isn’t just bad practice, it’s an unneeded risk. The good news is that doing it right isn’t complicated. It comes down to three fundamentals: proper overcurrent protection, correct wire sizing, and quality terminal connections. Get all three right and your rig is built to last. Miss any one of them and you’ve got a problem waiting to surface at the worst possible time.
Fuses & Circuit Breakers – Protect Every Circuit
Every wire run on your boat that carries current needs overcurrent protection. A fuse or circuit breaker is the last line of defense between a wiring fault and damage to your equipment. In a marine environment, where wiring is exposed to vibration, moisture, and temperature extremes, the question isn’t whether a fault can happen, it’s whether you’re protected when it does.
Here’s how to think about it:
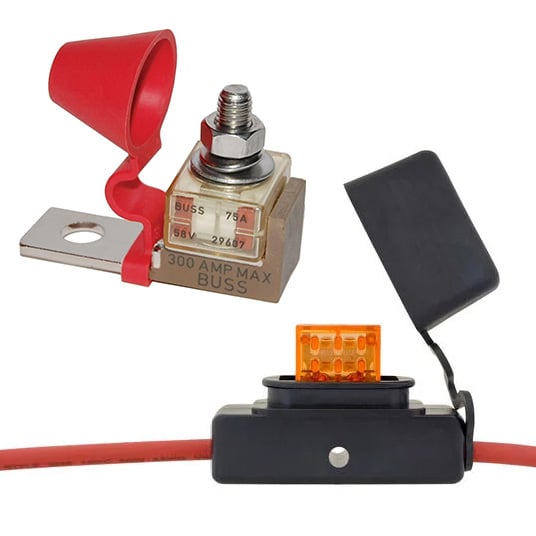
Fuses should be installed as close to the power source, your battery or bus bar as possible. The fuse protects the wire, not the device. Its job is to fail before the wire does, cutting the circuit before heat builds to a dangerous level. A fuse installed six feet from the battery leaves six feet of unprotected wire that can still carry a fault current long enough to cause real damage.
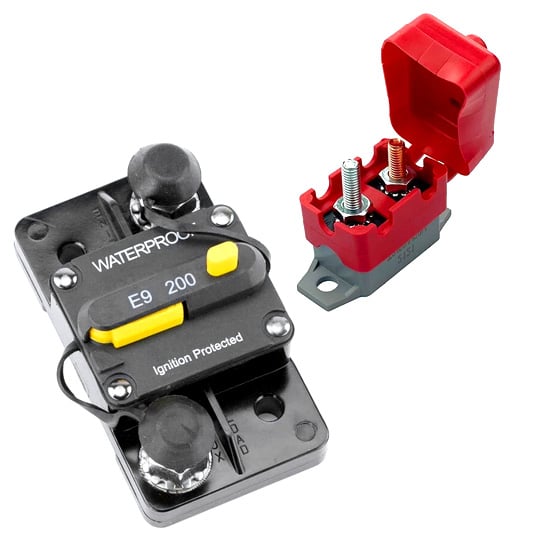
Circuit Breakers serve the same protective function as fuses but can be reset rather than replaced making them a practical choice for high-use circuits like trolling motor leads where a nuisance trip shouldn’t require a new fuse to get back fishing. Breakers are also easier to service in the field. Either approach is valid, what’s not valid is skipping protection entirely on any circuit.
👍 PRO TIP
Match Your Fuse or Breaker Rating to the Wire Gauge and the Circuit’s Expected Load
Its Important to match your fuse or breaker rating to the wire gauge and the circuit’s expected load not to the maximum your battery can deliver. A 60-amp fuse on a circuit wired for 30 amps doesn’t protect the wire. It just lets the wire overheat before the fuse ever blows. Size your overcurrent protection to the wire, and size the wire to the load.
Wire Gauge – Size It to the Amps It Carries
Undersized wire is one of the most common and most dangerous mistakes in DIY boat rigging. Wire that’s too small for the current it carries generates heat and heat in a wire run buried in your hull is a serious fire hazard. Marine wire sizing follows a straightforward principle: the more amperage a circuit carries, the heavier the gauge wire it requires.
A few ground rules to wire by:
Trolling Motor Leads carry the highest current loads on most fishing boats. A 36V, 112-pound thrust motor can pull 40–50 amps at full throttle. These runs require heavy-gauge wire typically 6 AWG or larger depending on run length and under sizing them is a mistake that will show up as heat buildup, voltage drop, and reduced motor performance before it ever becomes a safety issue.
Electronics and Accessory Circuits generally operate at much lower amperage and can be wired with lighter gauge wire but each circuit still needs to be sized correctly for its specific load. Don’t assume one wire gauge works for everything on the bus bar.
Wire Length Matters The longer the wire run, the more resistance it creates, and the heavier the gauge required to maintain safe operation and minimize voltage drop. A 10-foot wire run and a 20-foot wire run carrying the same amperage are not the same. Use our wire gauge and amperage chart as a quick reference to confirm the correct sizing before you cut.
Always use marine-grade tinned copper wire throughout your rig. Untinned automotive wire will corrode from the inside out in a marine environment, increasing resistance and creating failure points that are impossible to see from the outside of the insulation. Tinned copper is the only right answer on a boat.
Terminal Ends – The Right Connection for Every Application
A wire is only as good as its termination. The terminal end is where the electrical connection is actually made and a wrong, damaged, or improperly installed terminal is a resistance point, a corrosion point, and a failure point all in one.
Use the right terminal for every application:

Ring Terminals are the standard connection for battery posts, bus bars, and any bolt-down connection point on the boat. Ring terminals should be sized to match both the wire gauge and the stud diameter they’re connecting to, an oversized ring terminal on a small stud is a loose connection, and a loose connection generates heat. Always use marine-grade ring terminals with adhesive-lined heat shrink. Crimp them with a ratcheting crimper and seal them fully with a heat gun.

Butt Splice Connectors are used when two wires need to be joined mid-run. Like ring terminals, these should be marine-grade adhesive-lined heat shrink connectors not the bare metal crimp sleeves found at a hardware store. A properly installed marine butt splice is waterproof, corrosion-resistant, and mechanically sound. A bare crimp splice on a boat is an invitation for moisture intrusion and eventual failure.
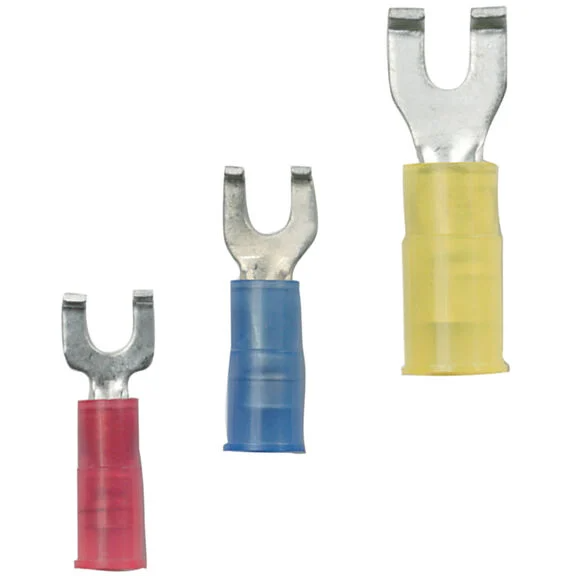
Fork / Spade Terminals can be used for quick-connect applications on accessory circuits but they are not appropriate for high-current connections like battery leads or trolling motor wiring. Know where each terminal type belongs and don’t use a convenience connector in a high-stakes application.
Never Use Wire Nuts on a Boat – Wire nuts are a household electrical product. They have no place in marine wiring. They back off from vibration, they don’t seal against moisture, and they fail. If you see wire nuts in a used boat’s wiring, consider it a red flag and replace every one of them before you put the boat on the water.
The Bottom Line on Safety
Proper fusing, correctly sized wire, and quality terminal connections aren’t the glamorous part of a rigging job but they’re the part that matters most. A boat that’s wired safely is a boat you can fish hard without thinking twice about what’s happening behind the panels. Take the time to do it right, and your rig will be as reliable and safe as the Norsk Lithium batteries powering it.
When in doubt on any safety-related wiring question, consult a certified marine electrician before proceeding. No fishing trip is worth a fire on the water.
HELPFUL RESOURCES FOR RIGGING
Links to additional information and details on Norsk Lithium batteries & chargers
Norsk Lithium Marine Battery Manual
Norsk Lithium Portable Sonar Battery Manual
FREQUENTLY ASKED QUESTIONS (FAQ)
Real Questions. Straight Answers.
These are the questions we hear most from anglers making the switch to lithium or rigging their boats for the first time. No fluff, just the information you need to rig with confidence.
DO I NEED A NEW CHARGER IF I SWITCH TO LITHIUM BATTERIES?
Not necessarily. If your current charger has a dedicated Lithium or AGM charging mode, it can be used to charge 12V lithium iron phosphate (LiFePO4) batteries. Check your charger’s settings before you buy anything new, you may already have what you need.
That said, if your charger only has a standard lead-acid mode with no selectable chemistry, it’s time for an upgrade. A charger without a proper lithium profile will either undercharge your batteries or charge them incorrectly, both of which cost you performance and cycle life over time. The Norsk Lithium EVO-TEC™ on-board charger lineup was built with selectable chemistry specifically to eliminate this problem across any battery configuration.
👉 Shop EVO-TEC™ On-Board Chargers
CAN I RUN BOTH LEAD-ACID AND LITHIUM BATTERIES IN MY BOAT?
Yes, with one important condition. You can absolutely run different battery chemistries on the same boat, as long as they are not wired together. Lithium trolling batteries and an AGM starting battery, for example, coexist on the same boat every day without issue. They serve different purposes, operate on separate circuits, and don’t interfere with each other.
What you cannot do is wire different battery chemistries together in a series or parallel connection. If you’re running three 12V batteries in series to build a 36V trolling system, all three batteries must be the same chemistry — lithium with lithium, AGM with AGM. Mixing chemistries in a wired bank creates mismatched charge profiles that will damage your batteries and compromise the safety of the system.
Keep them separated by application. Keep them matched within a wired bank. That’s the rule.
HOW DO I CONNECT 12V BATTERIES IN SERIES FOR A TROLLING MOTOR?
Wiring batteries in series increases your total voltage while keeping your amp hour capacity the same. This is how you build a 24V or 36V trolling system from 12V batteries.
For a 24V system (two 12V batteries in series): Connect the negative terminal of Battery 1 to the positive terminal of Battery 2. Your 24V output is then taken from the positive terminal of Battery 1 and the negative terminal of Battery 2. Or just by one of our 24V batteries and save space and weight. It’s two batteries in one!
For a 36V system (three 12V batteries in series): Connect the negative terminal of Battery 1 to the positive terminal of Battery 2. Then connect the negative terminal of Battery 2 to the positive terminal of Battery 3. Your 36V output is taken from the positive terminal of Battery 1 and the negative terminal of Battery 3. Or just by one of our 36V batteries and save space and weight. It’s three batteries in one!
A few critical rules for series wiring: all batteries must be the same voltage and the same chemistry. Mismatched batteries in a series bank will charge and discharge unevenly, shortening the life of every battery in the bank.
HOW DO I CONNECT BATTERIES IN PARALLEL?
Wiring batteries in parallel increases your total amp hour capacity while keeping your voltage the same. This is the setup to use when one battery isn’t enough to get you through a full day on the water.
To wire two batteries in parallel: Connect the positive terminal of Battery 1 to the positive terminal of Battery 2. Then connect the negative terminal of Battery 1 to the negative terminal of Battery 2. Your output is taken from either battery’s positive and negative terminals, the system sees them as one larger battery.
An important rule when wiring batteries in parallel is to always match identical batteries. Same voltage, same amp hour capacity, same chemistry, and ideally the same age and cycle count. Paralleling mismatched batteries forces the stronger battery to constantly compensate for the weaker one, accelerating degradation across both.
CAN I USE A LITHIUM BATTERY FOR A STARTING BATTERY?
Yes, but only if it is specifically designated as a starting battery. This distinction matters. Deep cycle lithium batteries are engineered for sustained power delivery over a long discharge period and they are not built to deliver the high burst of cold cranking amps required to start an outboard motor. Using a deep cycle battery as a starting battery is asking it to do a job it wasn’t designed for.
Norsk Lithium starting batteries are purpose-built for the task. They meet and exceed the starting battery requirements outlined in the Mercury® Marine Performance Bulletin 2022-19R1, meaning they’re validated against one of the most demanding outboard starting standards in the industry. Advanced internal protection features also safeguard your outboard and connected electronics from voltage irregularities during the starting process.
If you’re running a Norsk starting battery, you’re running the right tool for the job.
👉 Shop Norsk Lithium Starting Batteries
WILL A SINGLE 36V 60AH BATTERY BE ENOUGH POWER FOR MY TROLLING MOTOR?
For most anglers, yes. Modern 36V trolling motors, especially brushless models, are remarkably efficient, and a 60Ah lithium battery delivers significantly more usable capacity than its lead-acid equivalent thanks to lithium’s flat discharge curve and deeper usable depth of discharge.
That said, your fishing style and conditions matter. You may want to consider adding a second 36V battery in parallel or running an EVO-TEC™ DC-to-DC charger to replenish your bank while running if any of the following apply to your situation:
• You regularly fish river systems where your trolling motor is constantly fighting current
• You run a large, heavy deep-V walleye or multi-species boat with a high-thrust motor
• You consistently put in 12+ hour days on the water without returning to shore
For everything else, a typical day of bass, walleye, or inshore fishing, a single 36V 60Ah Norsk Lithium battery is a capable, reliable setup that will get you through the day with power to spare.
CAN I EXTEND THE LEADS ON MY ON-BOARD CHARGER TO REACH MY BATTERIES?
Yes, charger leads can be extended to accommodate your specific installation. This is a common need on larger boats where the optimal charger mounting location isn’t directly adjacent to the battery bank.
When extending charger leads, two rules are non-negotiable:
First, use marine-grade tinned copper wire throughout the extension. Standard automotive wire will corrode in a marine environment while tinned copper is the only appropriate choice on a boat.
Second, size your wire gauge correctly for both the amperage draw of the charger and the total length of the extended run. A longer wire run requires a heavier gauge to prevent resistance-related heat buildup and voltage drop.
Use our wire gauge and amperage chart as a quick reference to confirm the correct sizing.
WILL AN EVO-TEC™ DC-TO-DC CHARGER WORK WITH BATTERIES WIRED IN SERIES?
No. The Norsk Lithium EVO-TEC™ DC-to-DC charger lineup is not compatible with trolling batteries wired in series, such as three 12V batteries wired in series to create a 36V system.
Here’s why: EVO-TEC™ DC-to-DC chargers are non-isolated, meaning the input and output grounds share an electrical connection. In a series-wired battery bank, this creates a ground loop that can cause charging faults, which will prevent the DC to DC from functioning.
The non-isolated design is an intentional engineering choice, it delivers higher efficiency and a smaller physical footprint, which makes it ideal for the space-constrained environments found on most fishing boats.
Not sure which charging solution fits your configuration? Reach out to the Norsk Lithium team and we’ll get you pointed in the right direction.
👉 Contact Norsk Lithium 👉 Shop EVO-TEC™ DC-to-DC Chargers
Have a question that isn’t covered here? Visit our Help Center or reach out to the Norsk Lithium team directly, we’re anglers too, and we’re happy to help you build the right rig.
0 Comments